Did you encounter the “Input Not Supported” error message on your monitor when opening a game? Are you worried about what to do now? If you answered yes, you’ve arrived at the right place. This article will guide you through everything you need to know to get rid of this problem.
Firstly, you are not the only one experiencing this. The problem is shared by many players. Technically, there could have been a lot of different things that led to you running into this issue.
Specifically, this issue arises when you open full-screen games like VALORANT, League of Legends, Resident Evil 2 Remake, etc., that require attention to resolution settings. The problem occurs because your game’s resolution settings don’t match the monitor’s resolution settings.
Do not worry; there are a few solutions to this problem. The solutions suggested in this article can be tried.
Ways to fix the Input Not Supported problem on Monitor when opening game
There may be several ways to fix the said issue, but in this article, we will go through the two easiest ways.
Note: This article’s solutions to the input not supported issue are written with VALORANT in mind. You can go through the same procedure for the majority of other full-screen games.
ALSO READ:
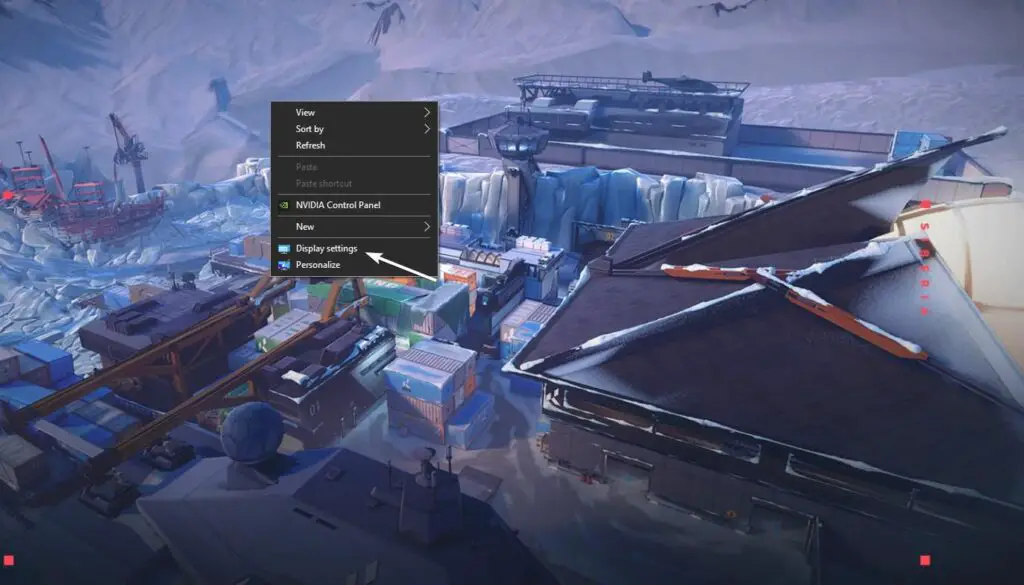
Before you move on to fixing this issue, you should first check the resolution supported by your monitor. To do so, simply right-click on the Windows home screen and subsequently click on the display settings option.
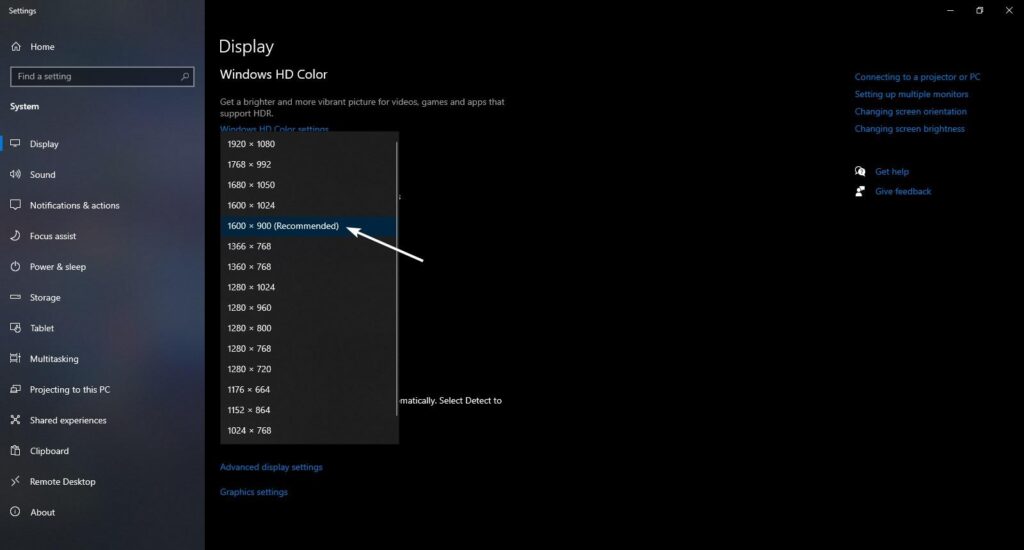
In the display settings, choose the resolution you want. It is advised to stick to the system’s recommended resolution.
After noting down the resolution supported by your monitor, you can resolve the resolution issue by using the methods described below.
1) By changing VALORANT resolution via the Nvidia GeForce Experience application
If you have Nvidia’s graphics card installed on your PC, it is likely that you already have its GeForce Experience application installed. If so, this is going to be a very handy process to get rid of the resolution issue, as this particular application helps optimize game settings for supported games effortlessly.
Simply follow the steps below:
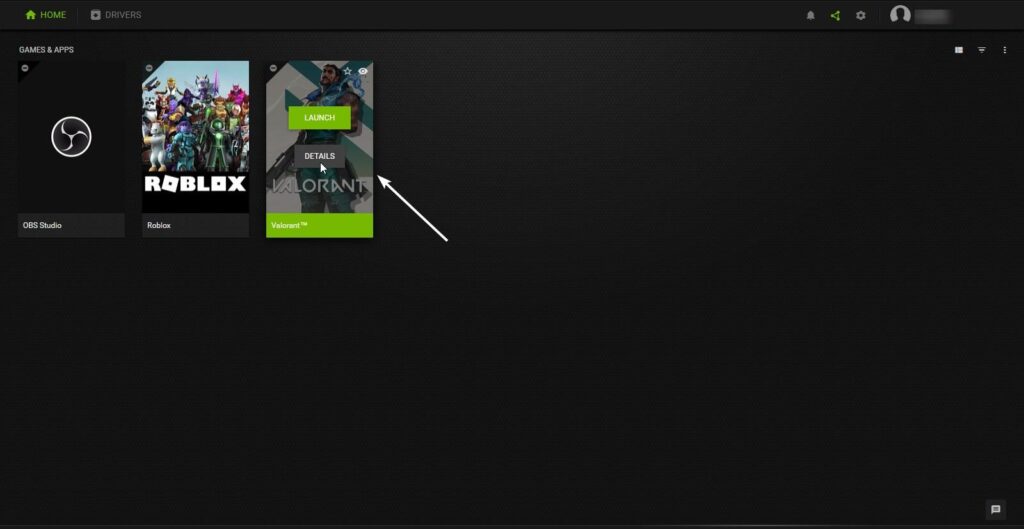
Step 1: Open and log in to the GeForce Experience application. You will see the games and software that GeForce Experience supports for optimization, including VALORANT.
Step 2: Move your cursor to VALORANT and click on the details option.
Step 3: You can spot the gear/settings icon on the middle-right side. Click on that.
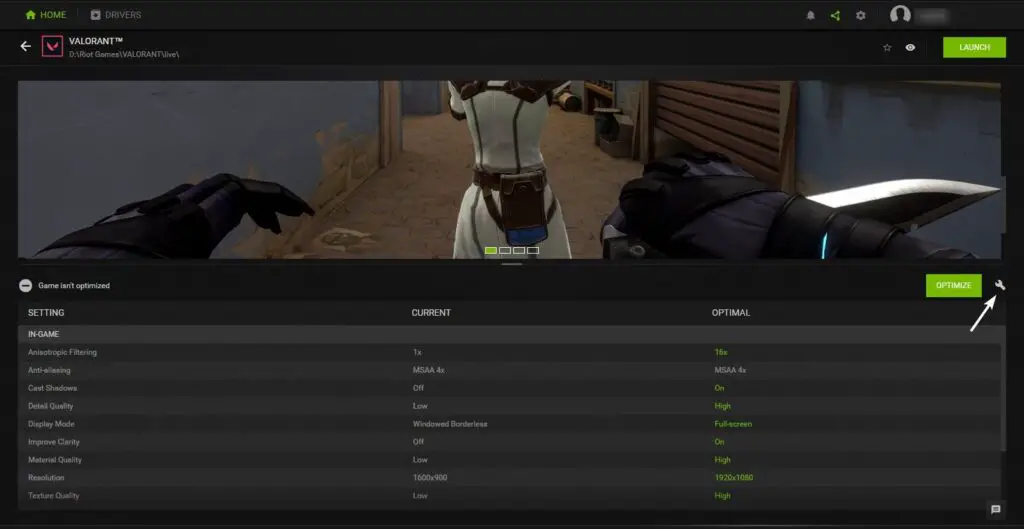
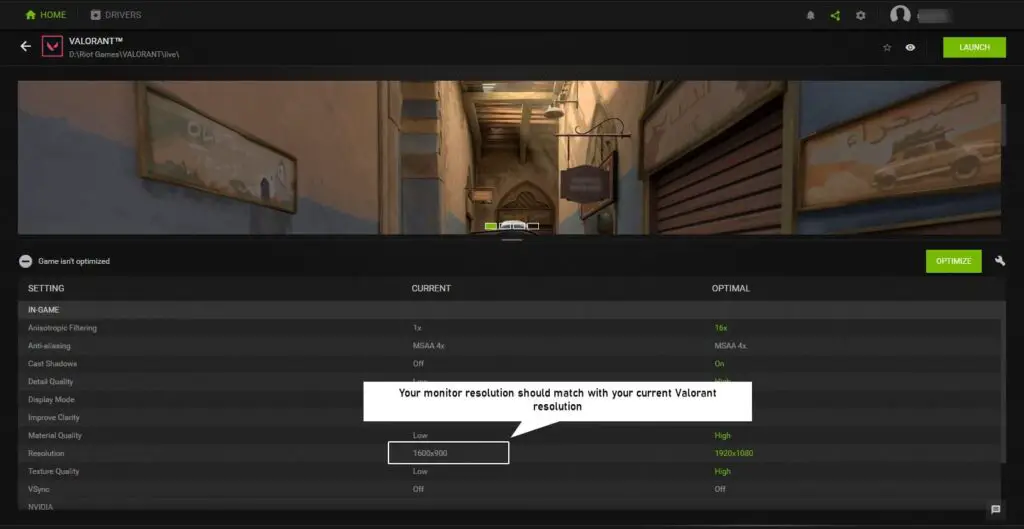
Step 4: Subsequently, change the resolution option to the same as what your monitor is currently set to. In this case, that is 1600 x 900.
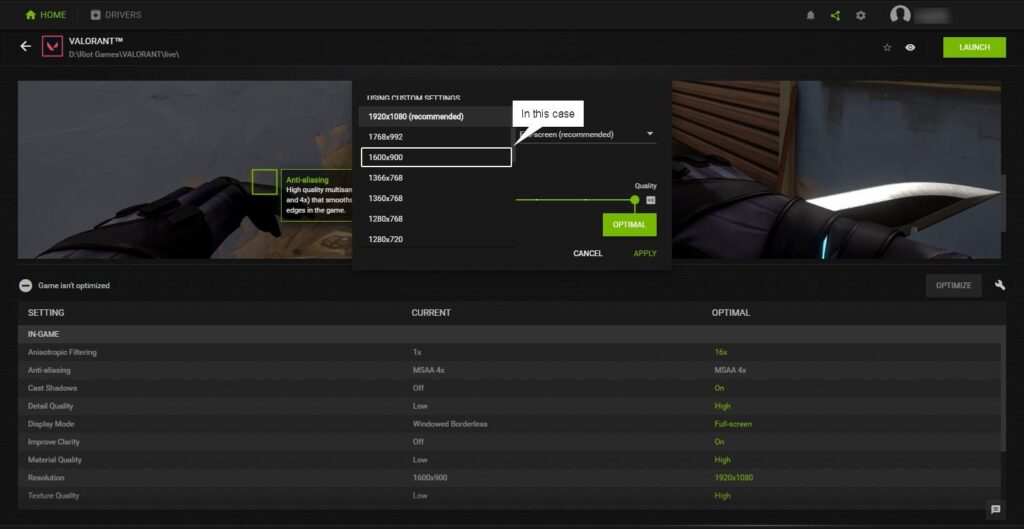
Step 5: Hit the apply button to confirm the change. Then, start your game. It should now start without displaying the “Input Not Supported” dialogue on the screen. It is good to restart your PC to avoid any further issues.
ALSO READ:
2) By setting custom resolution in VALORANT via the configuration file
If the first method isn’t suitable or doesn’t work for you, try this one. However, because it involves changing the game’s configuration file, this process can be a little complicated for non-technical users and also risky (in the sense that you may need to reinstall the game if you make any mistakes).
Here are the steps to follow to set VALORANT’s resolution to the same as your monitor’s:
Step 1: First, search for “run” in the Windows search bar and hit enter. Alternatively, you can press “Windows + R” on your keyboard.

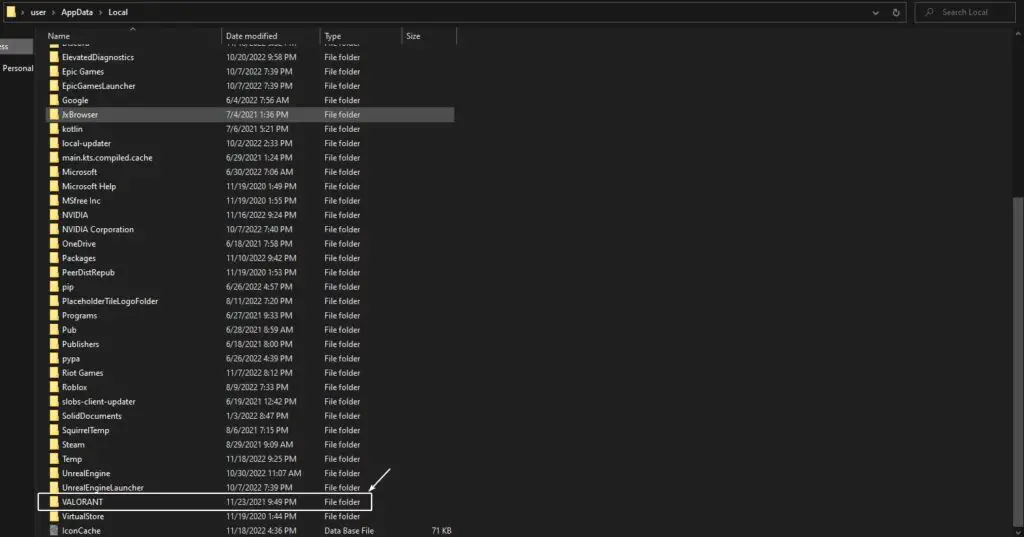
Step 2: Subsequently, type “%localappdata%” in the input box and hit enter. You will see a list of folders in front. Locate the folder named “VALORANT”.
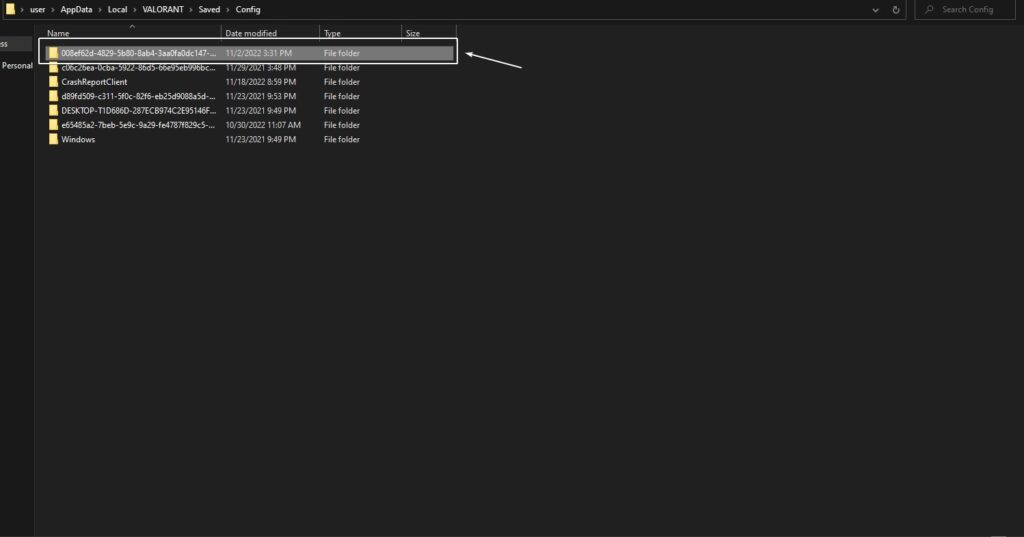
Step 3: Open the VALORANT folder, followed by the “Saved” and then “Config” folders in a hierarchy. Once you open the Config folder, you will again spot a list of folders. Keep opening subsequent folders until you find the “GameUserSettings” configuration settings file. It is more likely to be found in the first folder.
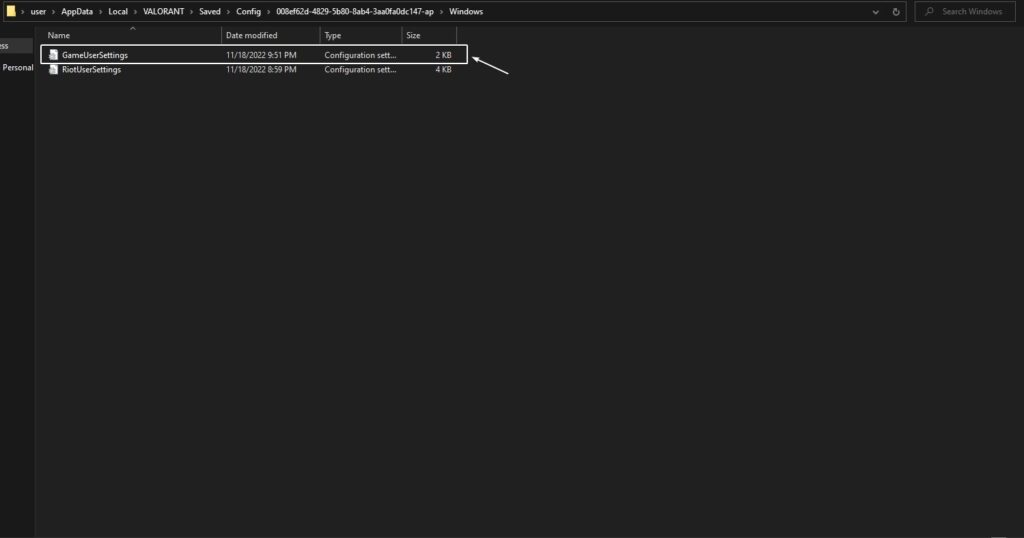
Step 4: Once you have found the GameUserSettings file, open it and change the X and Y resolution values to the ones that match your monitor’s.
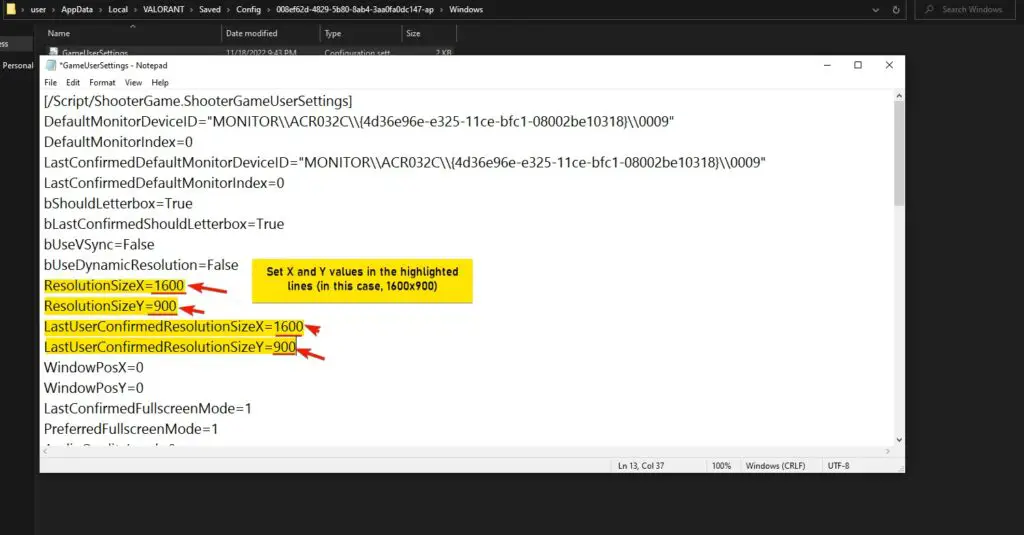
Step 5: After changing the resolution, save the file with “Ctrl+S” or by clicking the file tab followed by the save option.
Step 6: Lastly, restart your PC and launch VALORANT. It should now open normally.
Best Gaming Chairs


This way, you can get rid of the frustrating input not supported problem.
If you are a VALORANT player, you might like the following article:
- VALORANT Circle Crosshair: How To Create (With 15+ Codes)
- VALORANT Graphics Settings: FPS & Latency Issues Fixed
- Is Crouching Bad in VALORANT? (All Doubts Cleared)